- View missions in Usage & Credits.
- Complete different types of missions.
- Earn credits.
- Check your credit history in Usage & Credits.
- Use credits to explore more features.
Check-in
The Check-in feature allows you to sign in daily to receive system-issued reward credits. This mechanism helps you maintain consistent product usage and gradually accumulate credits.1
Enter the check-in page
Click the check-in icon to open the page.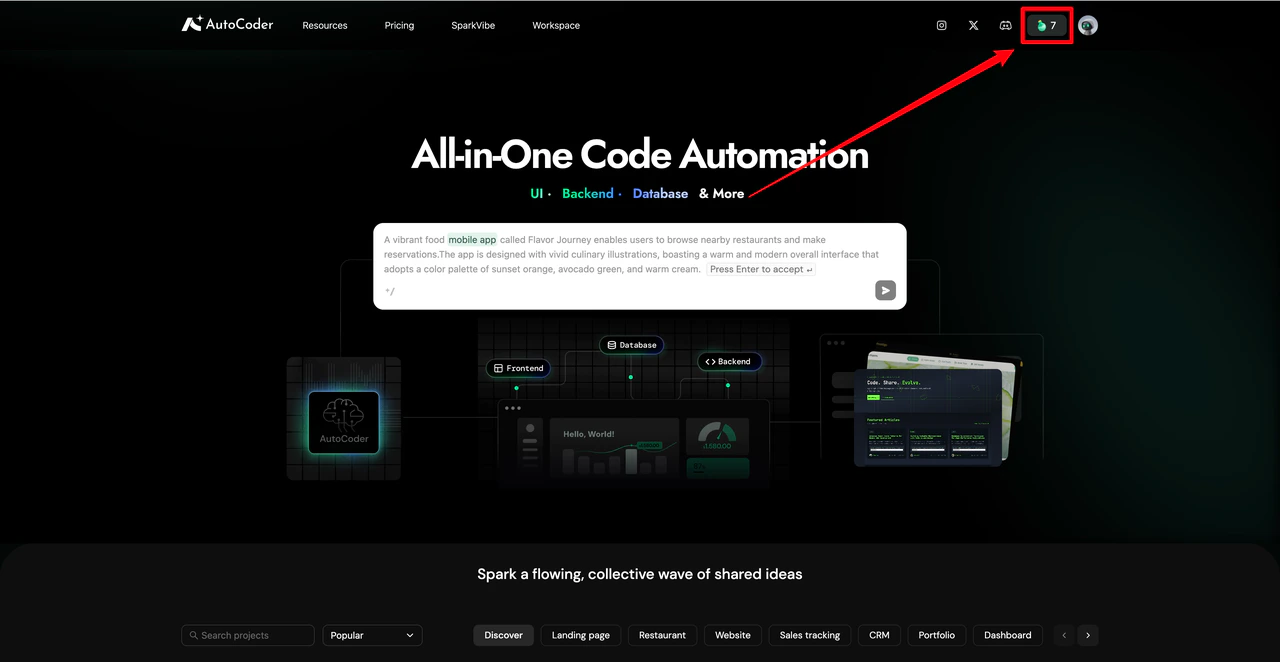
2
Complete check-in
Click Check to complete the sign-in and receive your credit reward.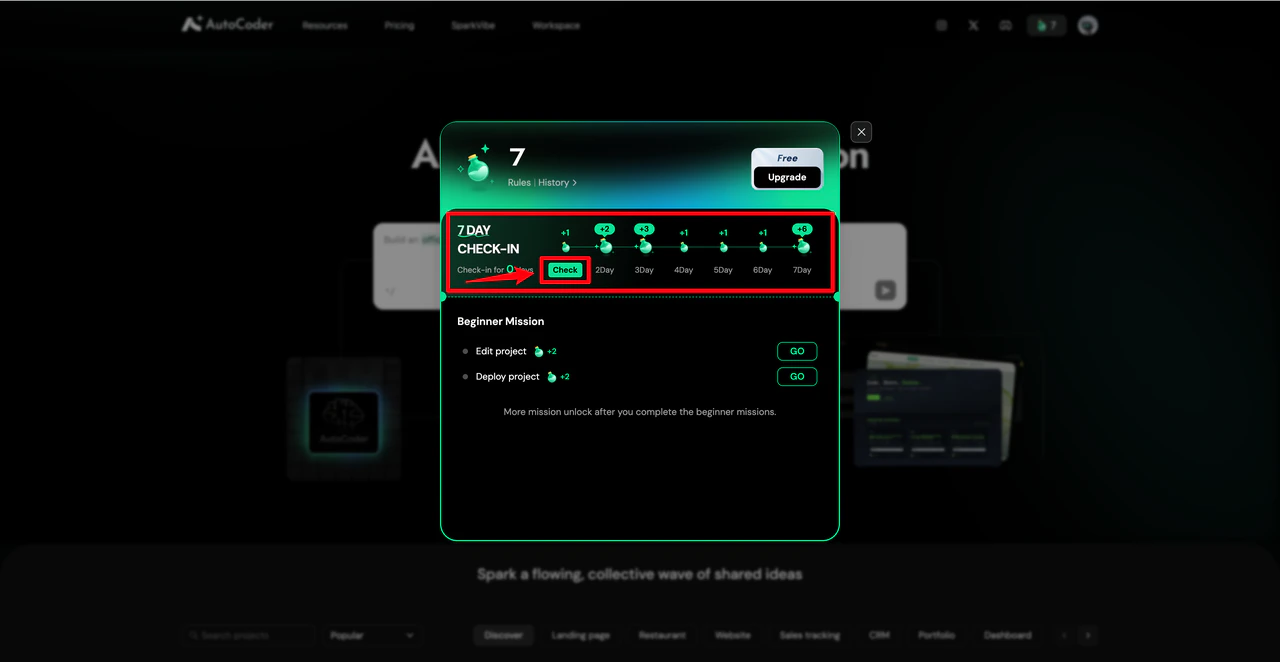
Missions
Missions guide you to experience the core features of AutoCoder.cc step-by-step. Different types of missions help you explore various product capabilities.Beginner missions
Beginner missions help you quickly familiarize yourself with basic AutoCoder.cc operations. Common missions include Create a project, Edit a project, and Deploy a project. Walkthrough: Create a project1
Start a beginner mission
Click the icon to enter Beginner missions.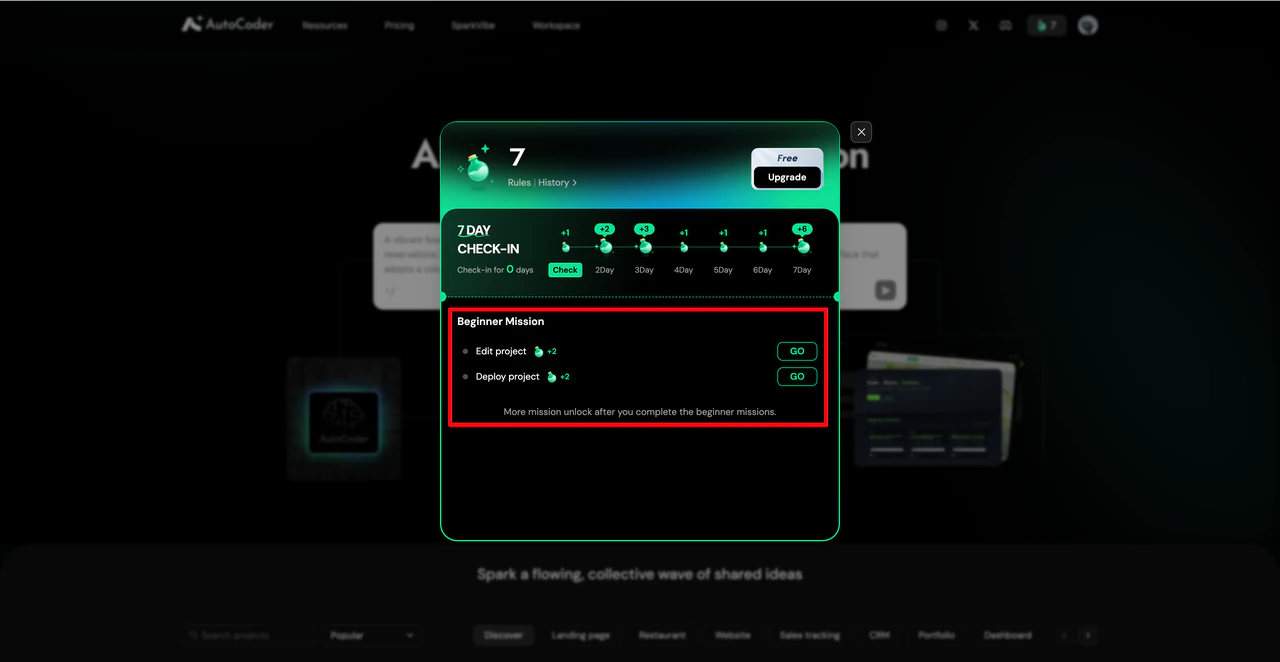
2
Initiate project creation
Click the Go icon to start creating a new project. Clarify your project type and input clear requirements.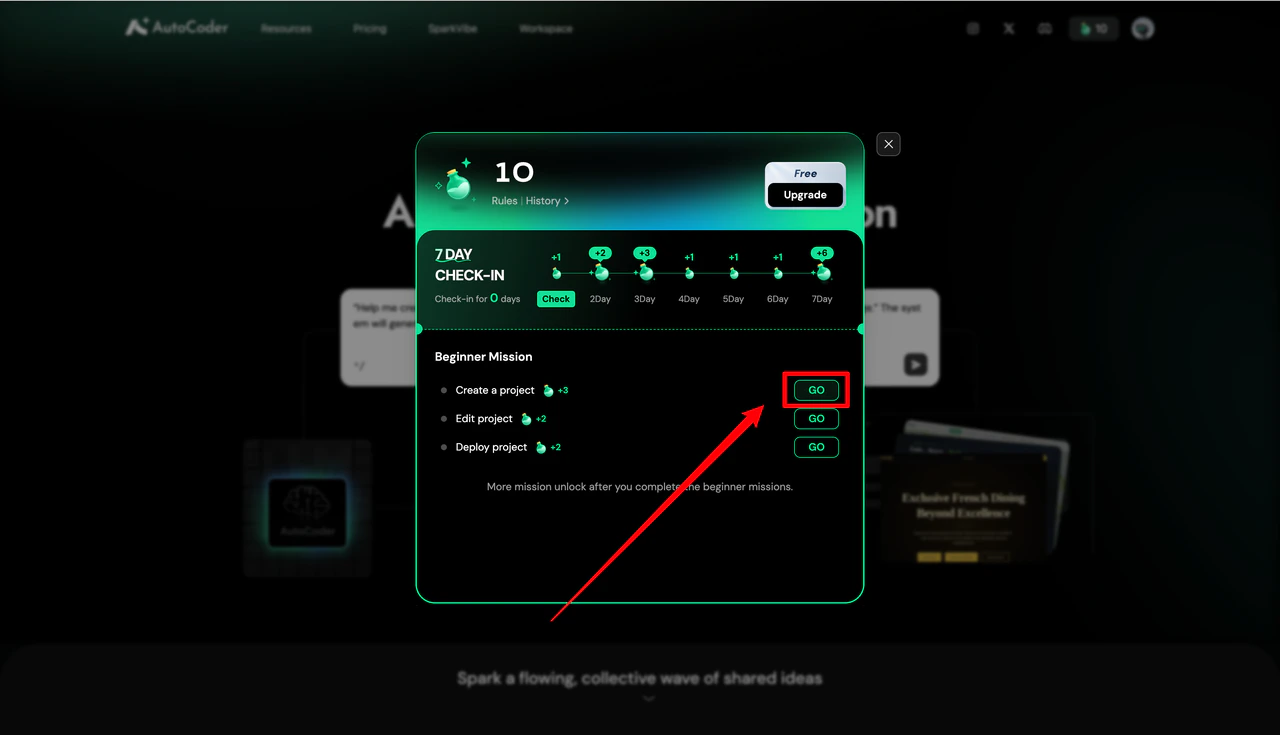
3
Generate demo
Input your requirements (e.g., “Help me create a pet store website with a homepage, service introduction, and contact us page”), then click Generate. AutoCoder.cc will automatically generate an initial project based on your description.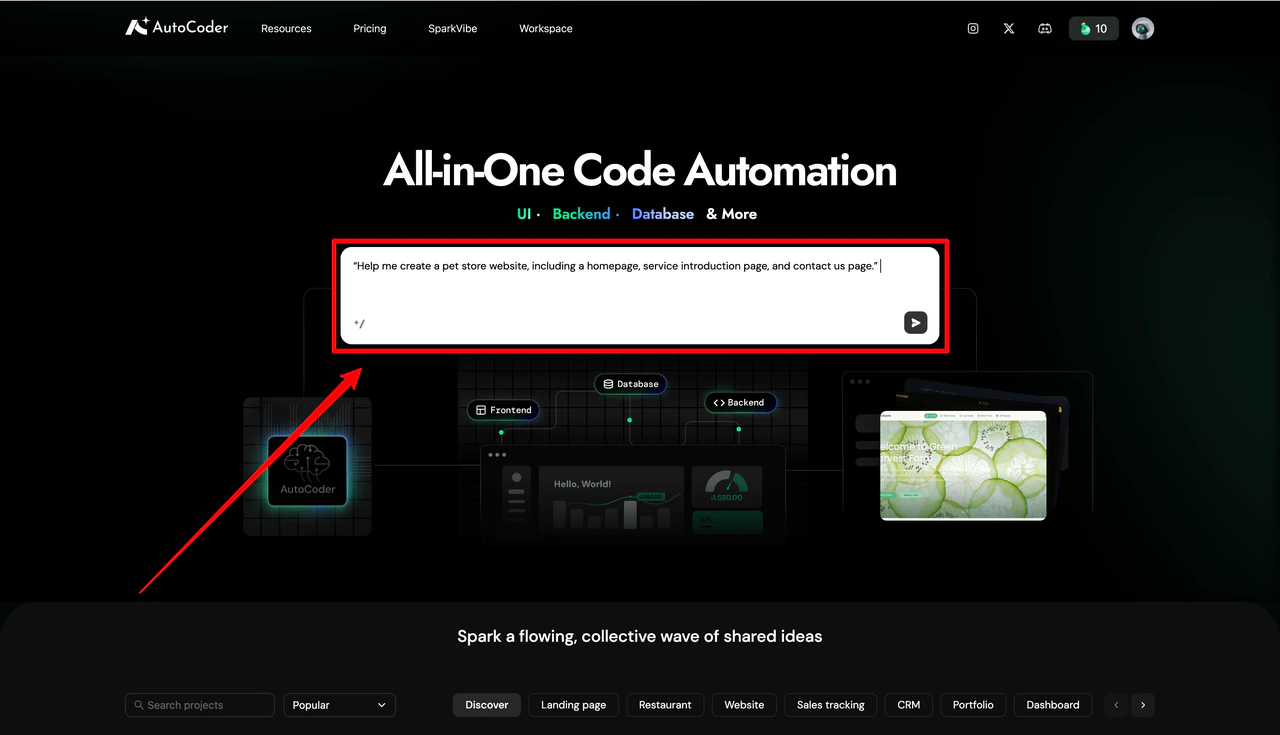
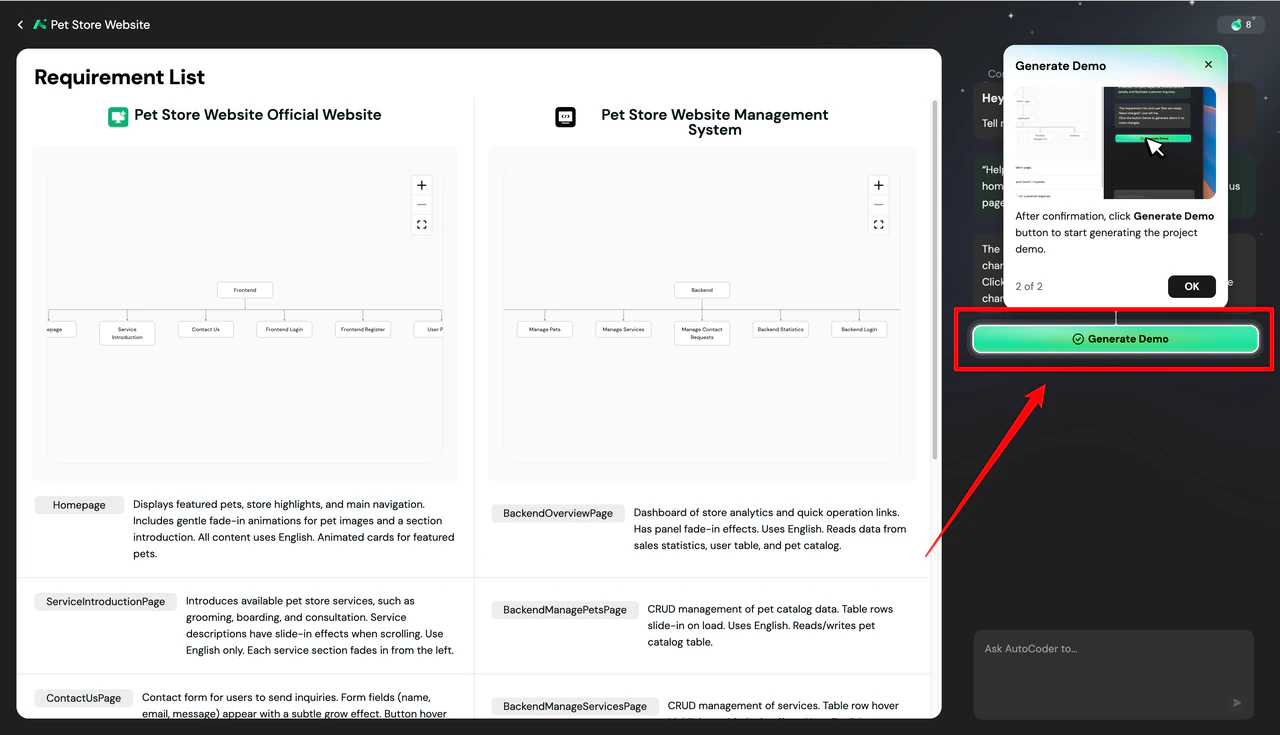
Completing all beginner missions (Create, Edit, Deploy) unlocks more advanced missions.
Daily missions
Daily missions encourage continuous use of AutoCoder.cc and community interaction. Common missions include Create or edit a project, Share a project to the community, and Like a project. Walkthrough: Like a project1
Locate the mission
Go to Usage & Credits, find Like a Project under Daily missions, and click Go.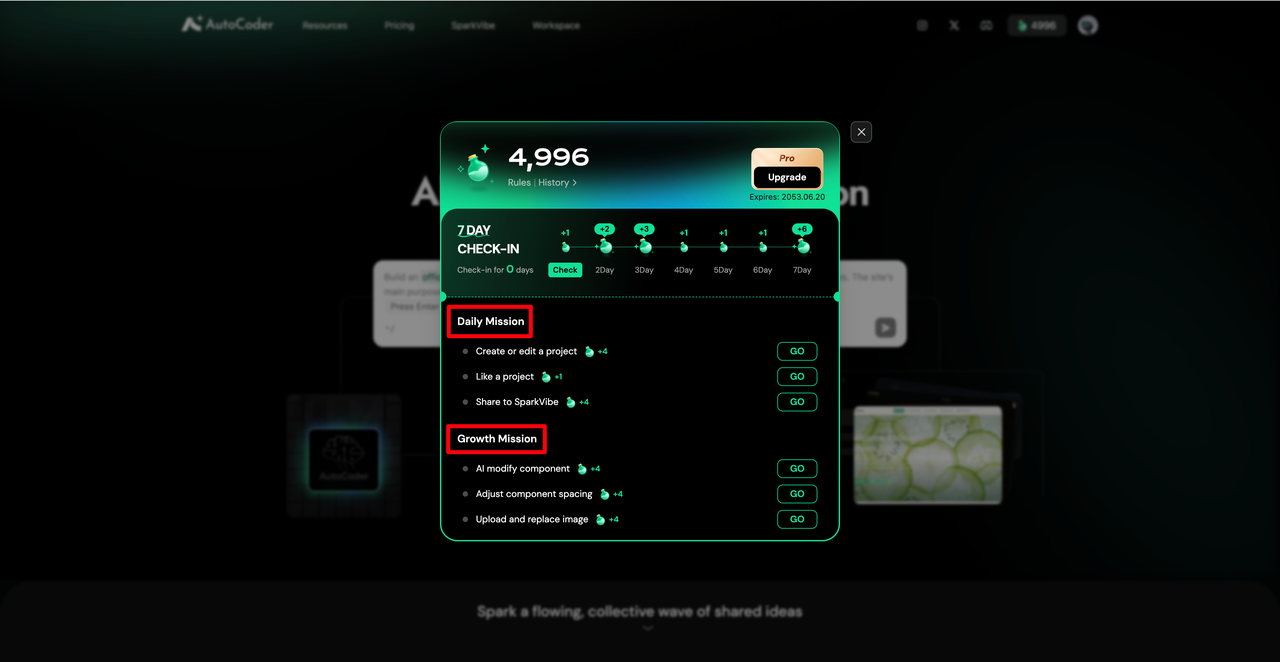
2
Browse SparkVibe
The system will redirect you to the SparkVibe community. Browse other users’ project demos and discover different types of applications.
3
Like a project
Click Like on a project card you appreciate. The system will record your interaction, mark the mission as Completed, and automatically add the reward credits to your account.
Growth missions
Growth missions guide you to explore advanced AutoCoder.cc features, focusing on specific editing capabilities to improve your efficiency in building applications.AI modify component
Use AI commands to adjust page elements, such as content, layout, and component styles.
Upload & replace image
Experience page image management by uploading local files and replacing existing images.
Modify text content
Familiarize yourself with text editing by updating titles, descriptions, and page copy.
1
Start the mission
In Usage & Credits, locate Upload and Replace Image under Growth missions and click Go.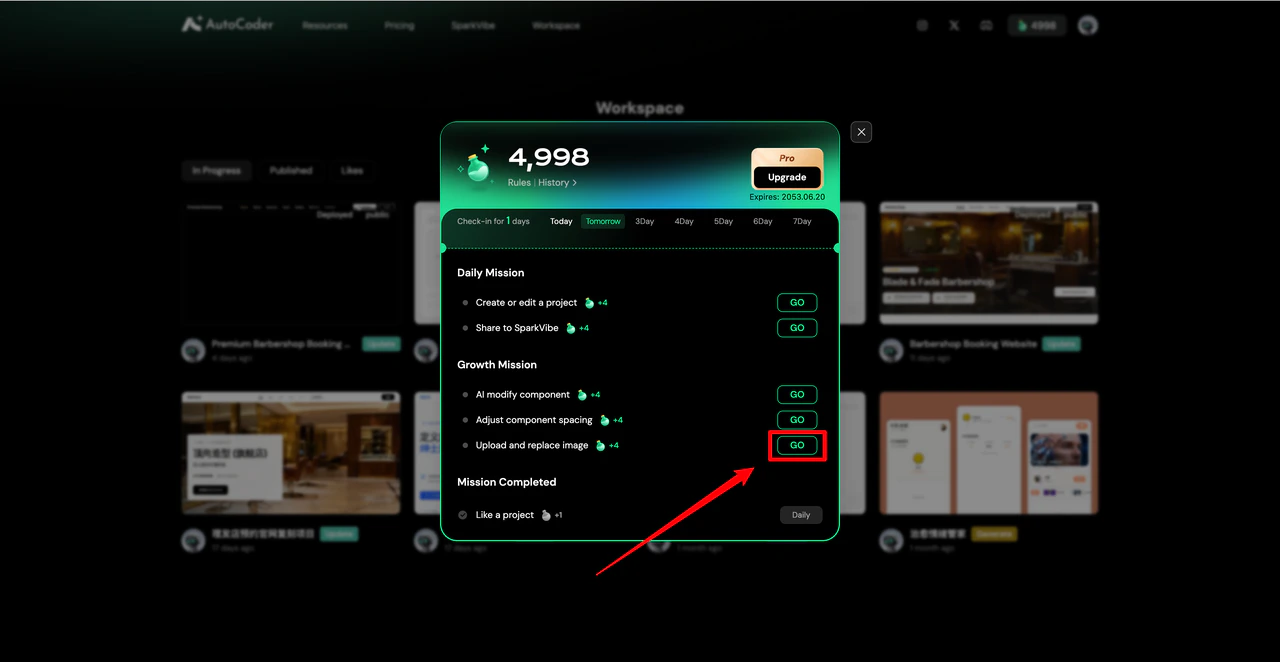
2
Select a project
Select the project demo you want to edit and click Confirm to enter the project page.
3
Enter Visual Editing mode
Click Edit in the bottom right corner of the demo page to enter Visual Editing mode.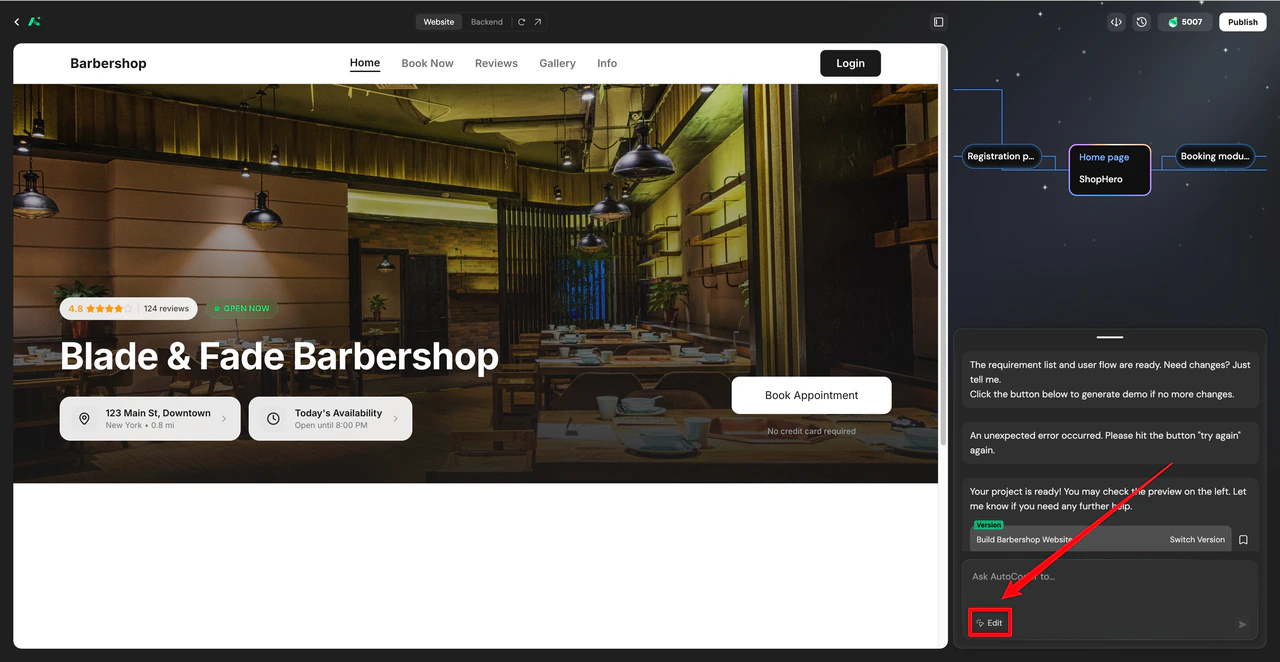
4
Replace the image
Click on an image component to open the editing panel. Click the image edit icon, then click click to upload to replace it. (Supported formats: JPEG, JPG, PNG. Max size: 10MB).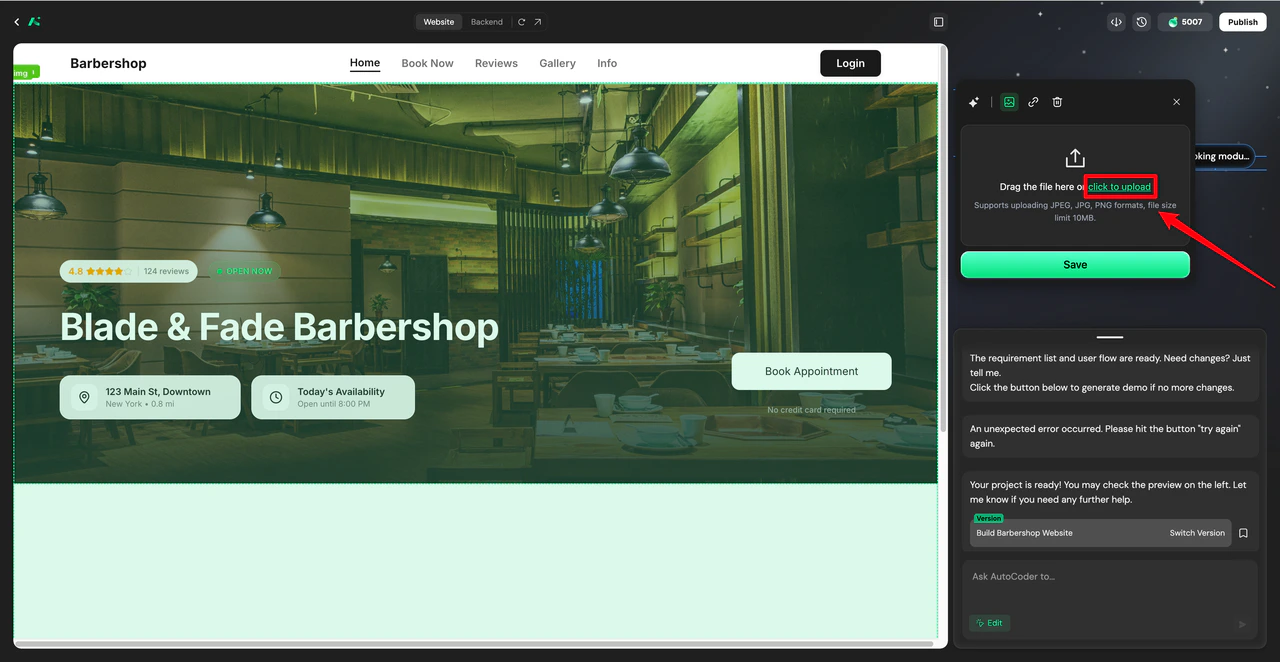
5
Save and exit
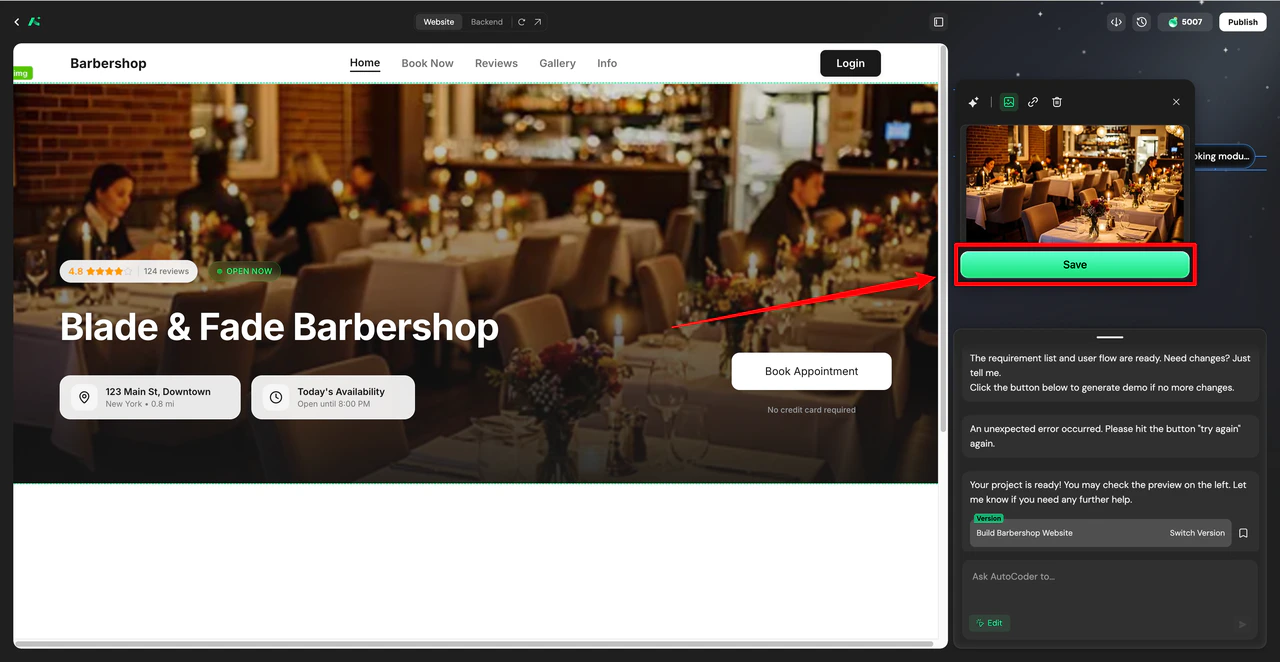
Once the new image is uploaded and displayed, click Save. Then, click Edit again to exit Visual Editing mode. The system will record the modification, mark the mission as Completed, and grant you the reward credits.